
Beginners Guide to Watercolor
Welcome to Introduction to Watercolor. Over this course we will learn how to choose and use watercolor supplies and build skills in the painting process, making you a confident watercolor painter.
Connecting
As you work through class material, there are a variety of ways to connect with me and other students.
LIVE CLASSES are held on ______
POST in progress or completed works of art to share with other students and myself.
EMAIL send an email my way if you want to share or receive feedback, or have any other questions. makeartstudios@gmail.com
Supply Suggestions
Necessary Supplies : You will need watercolor paper that is at least 140# in weight, a set of watercolors, a brush ( I prefer a synthetic round #4 or #6 as a starting point), mixing palette (you can use a plastic disposable plate or a porcelain one from the thrift store, paper towels, and water cup, tape ( I recommend painters tape), ruler or straight edge, table salt, rubbing alcohol, kleenex type tissue, white colored pencil, crayon or oil pastel, pencil and eraser,
Not a total necessity, but I will demonstrate use throughout class and they will be helpful: a flat surface to tape to (an old board, the back of a cookie sheet, or a piece of cardboard will work), an old toothbrush, a hairdryer, masking fluid, sumi ink, white paint marker or pen, micron pen, transfer paper.
You can complete this class with only the must have supplies listed below. Use what you have on hand if you can. If you are someone that likes to purchase exact products, here is recommended list:
Watercolor Journal. Watercolor Paper. Set of watercolors. Round #6 Watercolor brush or set of watercolor brushes painters tape. mixing palette.
If you want it all, add these non essentials to your shopping cart: sumi ink. white paint marker. transfer paper. micron pens. masking fluid
More information and specific examples on the necessities can be found during your first lesson below, and here on this blog post.
on your own: Introduction to Supplies
In this first lesson, we will get to know our supplies. Learn all about the most important tools and get my recommendations on what, where, and when to purchase. Read the breakdown below and watch the videos for further explanations. Remember that you can speed up, slow down, and pause videos to help you watch them at a comfortable timing. Print out these watercolor handouts for a quick reference if you desire. Watercolor Supplies Intro to Watercolor
Watercolor Paper
Water color paper is very different than the paper that spits out of your printer. It is meant to not only absorb loads of water, but also keep the paint on the surface for a period of time so artists have the chance to manipulate it. Watercolor paper comes in three different surfaces; rough, cold press, and hot press. It is also offered in a variety of thicknesses, referred to as weight. The weight refers to how much the ream of paper weighs as a whole. Most artist work in 140 pound or above for finished paintings, and 90 pound for quick exercises.
Your most important purchase will be Watercolor Paper. If you can swing it, I recommend getting a watercolor sketchbook to use for some of our quick exercised and a great record of your practice and progress. This watercolor sketchbook (also can be found at Hobby Lobby) is a good budget buy. I also this one (I like the length of it), but it’s not quite as easy to find. You will also need a few sheets of watercolor paper, a pack of 140# watercolor paper will suit you well. This is my absolute favorite student watercolor paper. You can find it at Hobby Lobby or even Walmart. You can also purchase it from Amazon as well. Another student grade watercolor paper alternative is here, or this.
When you’re ready to upgrade, there are a wide variety of brands, weights, and textures. I recommend that you always keep experimenting. It sounds odd, but watercolor paper makes a great gift - many a Christmas morning I unwrapped pretty patterned paper to reveal a beautiful lush textured piece of white paper underneath. Arches watercolor paper has a fantastic reputation and is used by a wide variety of professional watercolorists. Stonehedge cold press watercolor paper in another brand that gets a lot of attention as well.
Watercolor Paint
Watercolors are most commonly purchased in pans or tubes, though they can come even come in liquid, powders, and pencils and crayonsl. I prefer to use pans when making small paintings and directly out of the tube for larger watercolors. However, it just depends on personal preference. In either case, tubes or cakes, you will need water to achieve the right consistency in order to paint. There are many brands of watercolor paint and most can be grouped into children grade, student grade, and professional grade. The difference between the tiers of paint, besides price, is the amount and quality of pigment within the paint. In watercolor, pigment is suspended in gum arabic, a non toxic, water soluble solution. It is common to learn with a quality student grade watercolor brand and then purchase professional grade watercolors when you make the leap to sell your work or as you become more comfortable (and obsessed) with the medium.
Having a nice set of watercolor is a joy, I suggest that after you purchase your watercolor paper and sketchbook, you purchase a set of student grade watercolors. Pan or tubes are fine, but if you’re feeling overwhelmed a pan set might be more straightforward.
In my opinion, this basic set is one of the best values you can purchase as a beginner, I still bring this particular set with me when I travel. Another favorite of mine is the set of 36 colors from Kuretake. More colors, a little less transparent than the pocket palette mentioned previously, and unfortunately it doesn’t travel well - but a set I still use often (it also includes some metallics!). I’ve had this pelikan brand set of 24 for over 25 years, and I still seek it out for its more opaque color, I do find this brand to be a little more chalky in tone compared to the previous two. Usually cheaper, more towards the kid’s end of quality, and thus has more filler and less pigment- but still a nice little set is the Koh-i-noor brand (also a great travel companion).
If you’re not easily intimidated and/or want to make a bit more of an investment right out the gate, you can purchase watercolors in tubes. The main benefit being pigment will be at full strength when pulled straight from the tube and you can choose colors when bought individually. You can purchase tubes as sets as well, which simplifies things. Arteza has a set of 12 that is a fair set of kid/student grade paint. If you want to go up a step in quality, you should look at brands such as; Winsor & Newton Cotman, Grumbacher, or VanGogh.
If you are purchasing paints as individual tubes or pans, there are a plethora of colors to choose from. The most basic of palettes ( in my opinion) should include one of each primary color (red, yellow, and blue) plus a brown shade. I prefer painting with a set of basic 12. If you want to work from tubes and set up your own palette, my color suggestions follow.
Artists have different preferences, but- if you need a place to start, here are my recommendations for a basic set of 12 colors, as well as some expansion colors when time and money allow.
If you have the means and want to add a few more, I would add in a few colors to expand your palette, because - I mean, color is pretty.
opera rose
cerulean
burnt umber
mars black
If you’re like me and just can’t help yourself, here are a few others that I find special and can’t help but reach for.
naples yellow
pthalo turquoise
permanent magenta
phalo green light
ultramarine violet
alizarin crimson
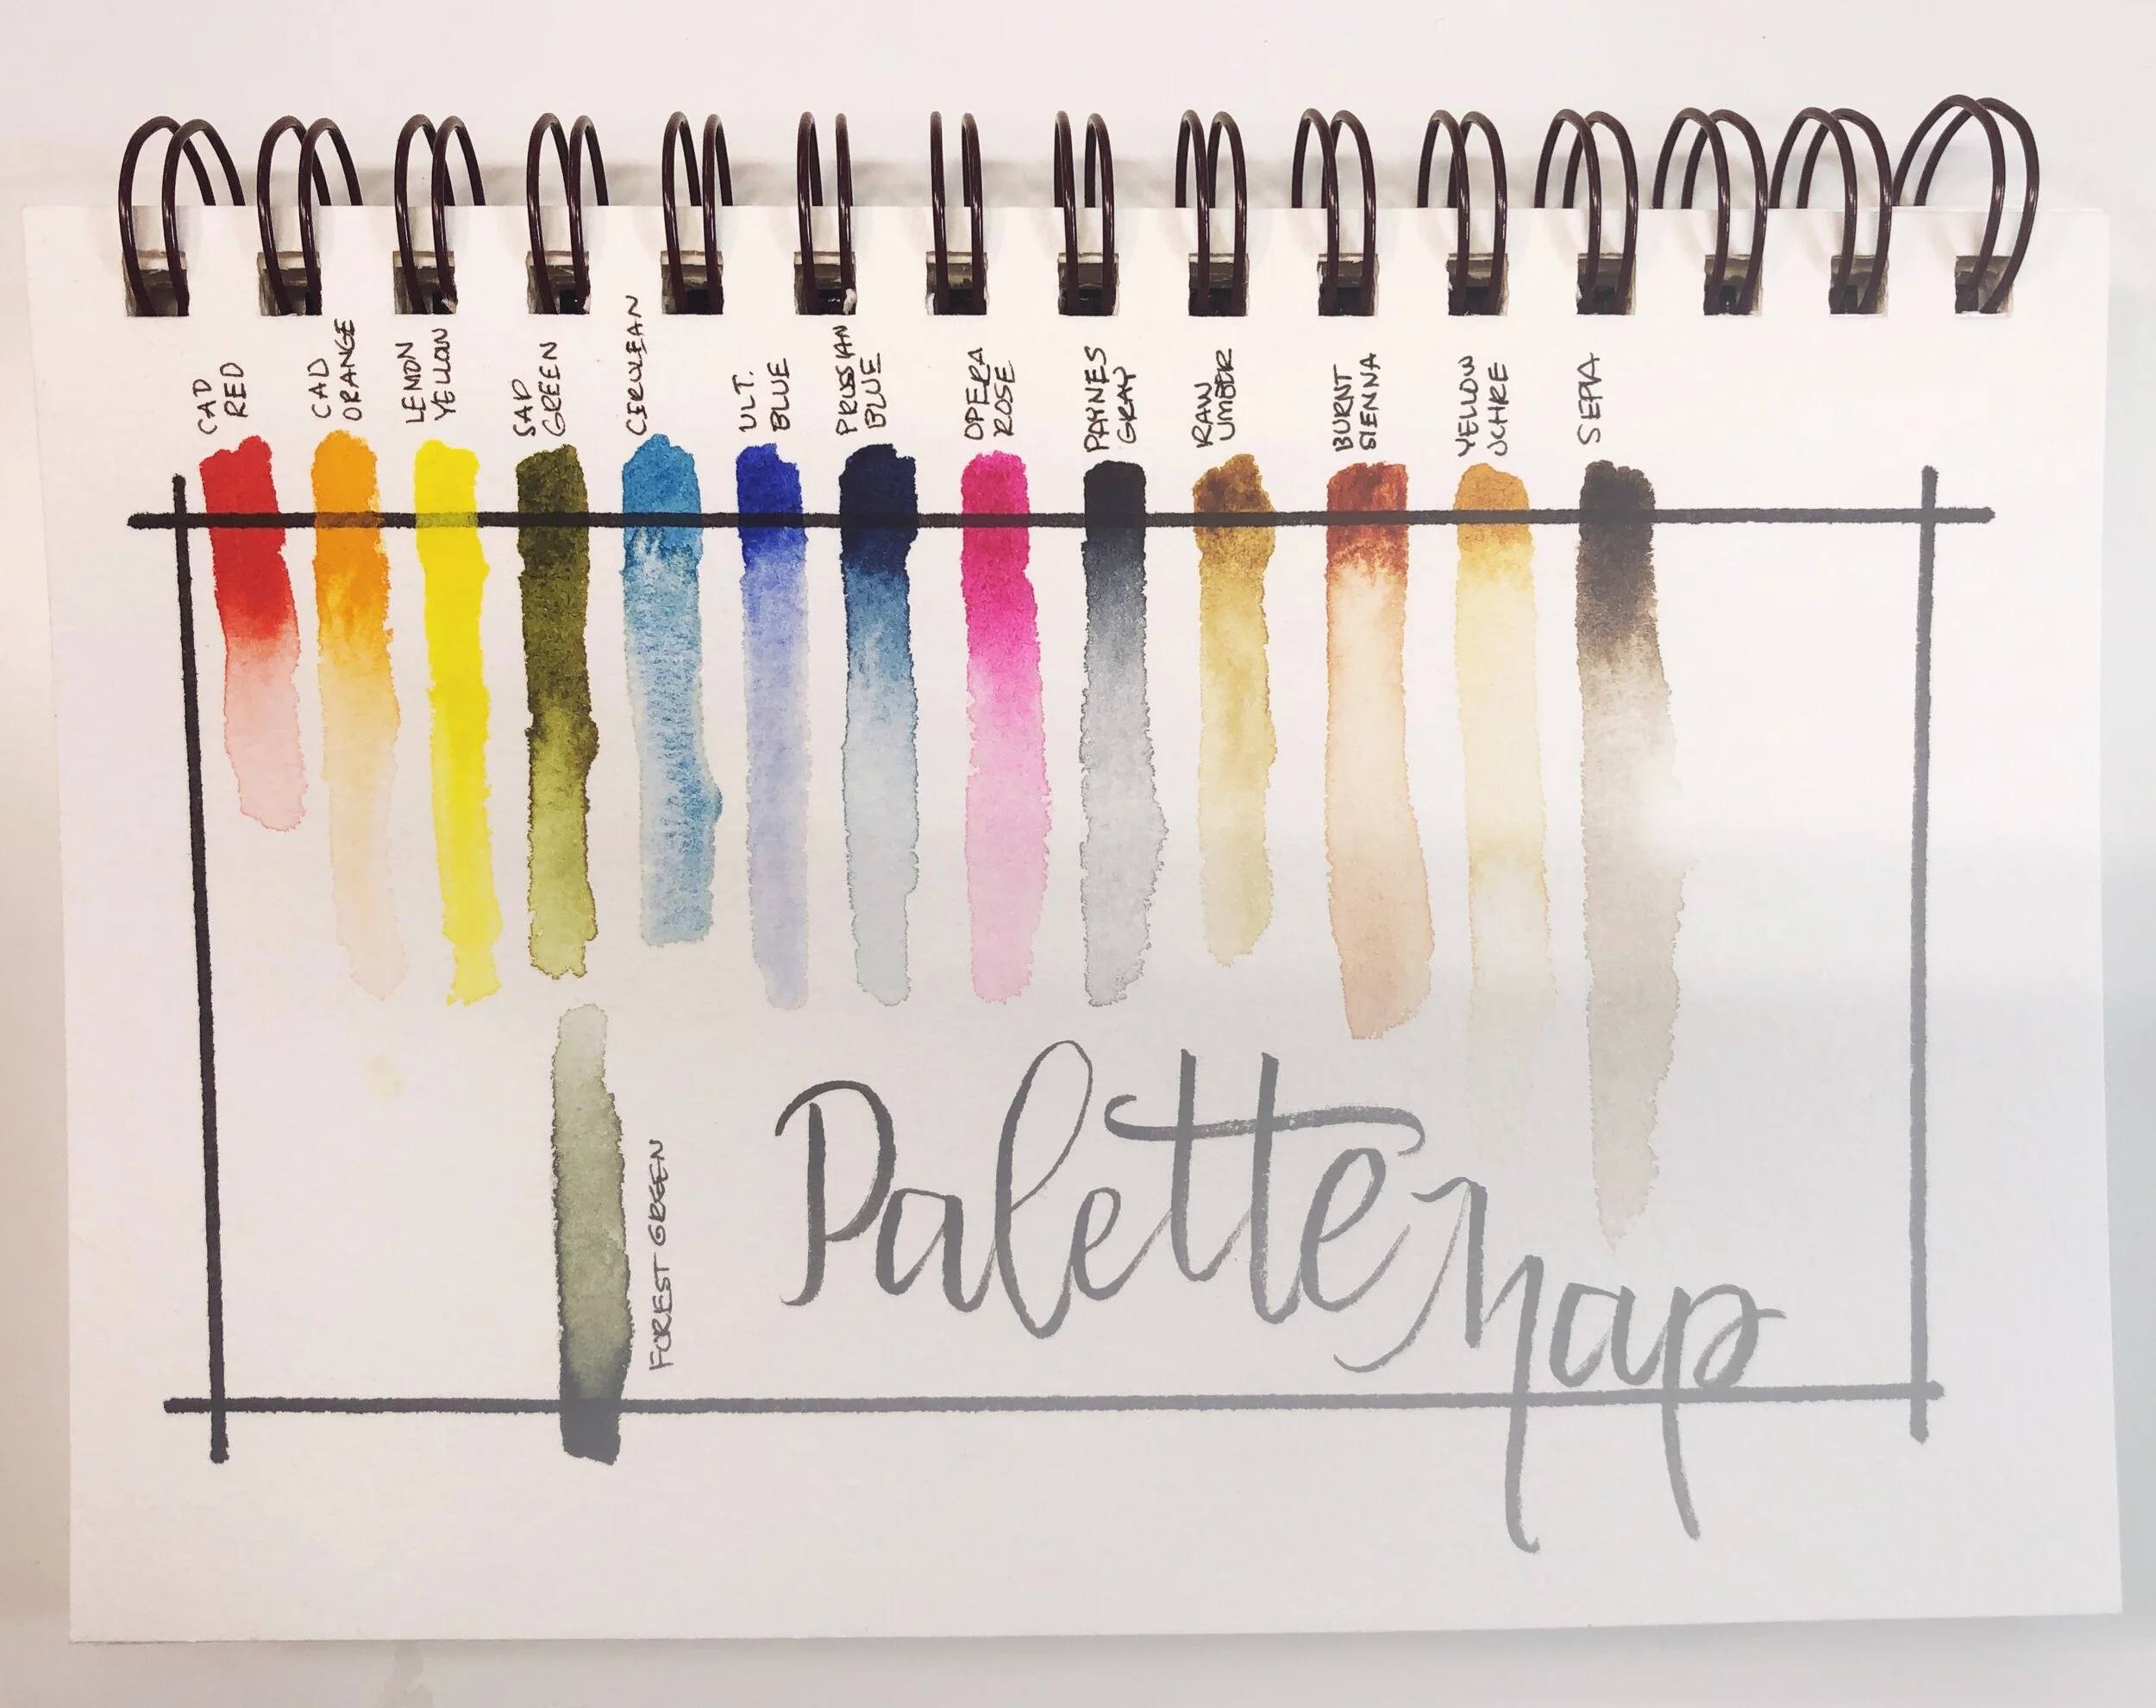
Basic Palette of 12
cadmium red
cadmium orange
cadmium yellow
lemon yellow
sap green
forest green
prussian blue
ultramarine blue
paynes gray
yellow ochre
burnt sienna
sepia
When you’re ready to advance to a more professional set, you can purchase individual color from time tested brands. I personally use a combination of pigments from Sennelier, Daniel Smith, Mission Gold, and Windsor Newton.
Watercolors can also be purchased in many forms. Watercolor pencils, crayons and liquid watercolor area great wish list items. I love the Dr. Martin’s Concentrated Watercolors. The colors are the brightest around. (They are however, not light fast, and thus more appropriate for work that will be scanned in and printed or shared digitally.)
Watercolor Brushes
There are overwhelming amounts of brushes to choose from. Generally speaking, most beginning watercolorists rely on a variety of round brushes for the bulk of their painting needs and a large mop brush for washes. The very best watercolor brush you can buy is a Kolinsky Sable brush, made from the hair of a weasel that lives in Siberia ... who would have guessed, but boy -they are expensive. Squirrel, goat, and boar hair all hold their shape well and soak up a lot of water, making them great brushes as well. Synthetic bristles are a great alternative at a much more affordable price, but quality varies greatly so I recommend that you try them out beforehand or read up on other artists opinions before making a purchase.
A decent paintbrush is nice to have around. If you’re going to purchase one brush, I suggest having a mid sized round watercolor brush at the very least. The Utrecht round #6 is my recommended first brush purchase (you have to order it from Blick, they do have curbside pickup though - I may have a few available for purchase & porch pickup as well). Princeton is a well known brush brand (yes, that’s a thing) and this one is decent. Their Neptune brand is known for holding a crazy amount of water (great for painting loose florals), I prefer their Heritage brand, this is The set that I’ve used for years. And for a crazy purchase I splurged (big time) on these a few years ago and they have held up beautifully.
Other helpful Watercolor Supplies
Mixing Palette: Most pan watercolor set come with a mixing surface, but sometimes it’s nice to have a larger surface to pix up colors. The most budget friendly option is just to use a plastic coated disposable plate. A step up (and my personal favorite) is an old (and never again used with food) porcelain dish, a great thrift store search and find item. If you prefer a palette with wells, to keep your colors from mixing - check out the flower petal shape. I love these little stacking porcelain plates to store colors, and this small tray is great for dragging out different values of color from the tube. If you purchase tube watercolors, you will want to set up a palette. This palette is wonderfully simple and a great size to bring on the go. This larger plastic palette has a middle area that makes mixing a breeze and is one that I’ve had since junior high and this porcelain one is dreamy, but an investment and doesn’t travel well. You only need one surface to start with, and like I said a dsiposable plate works just fine - but there are a lot of beautiful things out there.
Tape: I prefer to just use a basic blue painters tape. Other artists use masking tape or washi tape. Feel free to use what you have on hand.
Fine Tipped Marker or pen: Nice to have on hand to add small detail or add a pen and ink aspect to paintings. A ball point pen will work, a fine tipped sharpie will give you a more permanent line. I really love Micron pens, they come in a variety of tips, making it really fit any need.
Masking Fluid: Also called miskit, friskit, and drawing gum, art masking fluid is the consistency of rubber cement and it is used in watercolor to coat your watercolor paper, preserving the blank paper underneath, This allows you to paint right over top and later remove the masking fluid, once again exposing the paper below. I’ve always used Winsor Newton brand, but there are many out there, just be sure NOT to use your nice watercolor brushes in it! This is something you use with those craft brushes!
Transfer Paper: Transfer paper will get your image on a bit faster, but holding it up to a window is just fine. One sheet will last a good long time as it is re-usable. If you want, I’m happy to leave out a sheet for you to come grab if you’re local. If you want to purchase your own, try these from amazon or grab from hobby lobby or Michael’s
Getting to Know your Colors
Grab all of your watercolor paints, keep them in their packaging and arrange them n rainbow order; Red, Orange, Yellow, Green, Blue, Violet, followed by neutral colors (browns and blacks). Most pan set will allow you to pop them out and in, so you can arrange them to your taste.
Note, In this class, we will not be using white watercolor paint for this class, put it aside for now.
Rainbow order, followed by neutrals is how I arrange my paint, that being said - if you’re looking down and thinking, I want yellow ochre to be by my yellows and burnt sienna to sit next to little red - then fine by me! You are the artist, you do what works for you. Now that we see our colors all out and arranged nicely, we can pop the pans back in or squeeze out some of that luscious paint onto our palette.
Setting up your Palette:
PREP: See above
SUPPLIES: watercolor paint, palette
Creating a Palette Map:
PREP: Make sure to have your set of pan watercolors or palette out and ready to go. If you are using watercolor that came in tubes, make sure to set up your palette ahead of time.
SUPPLIES: watercolor paper or watercolor sketchbook, watercolor palette, watercolor brush. ruler or straight edge, permanent marker or pen, water cup, and paper towels.
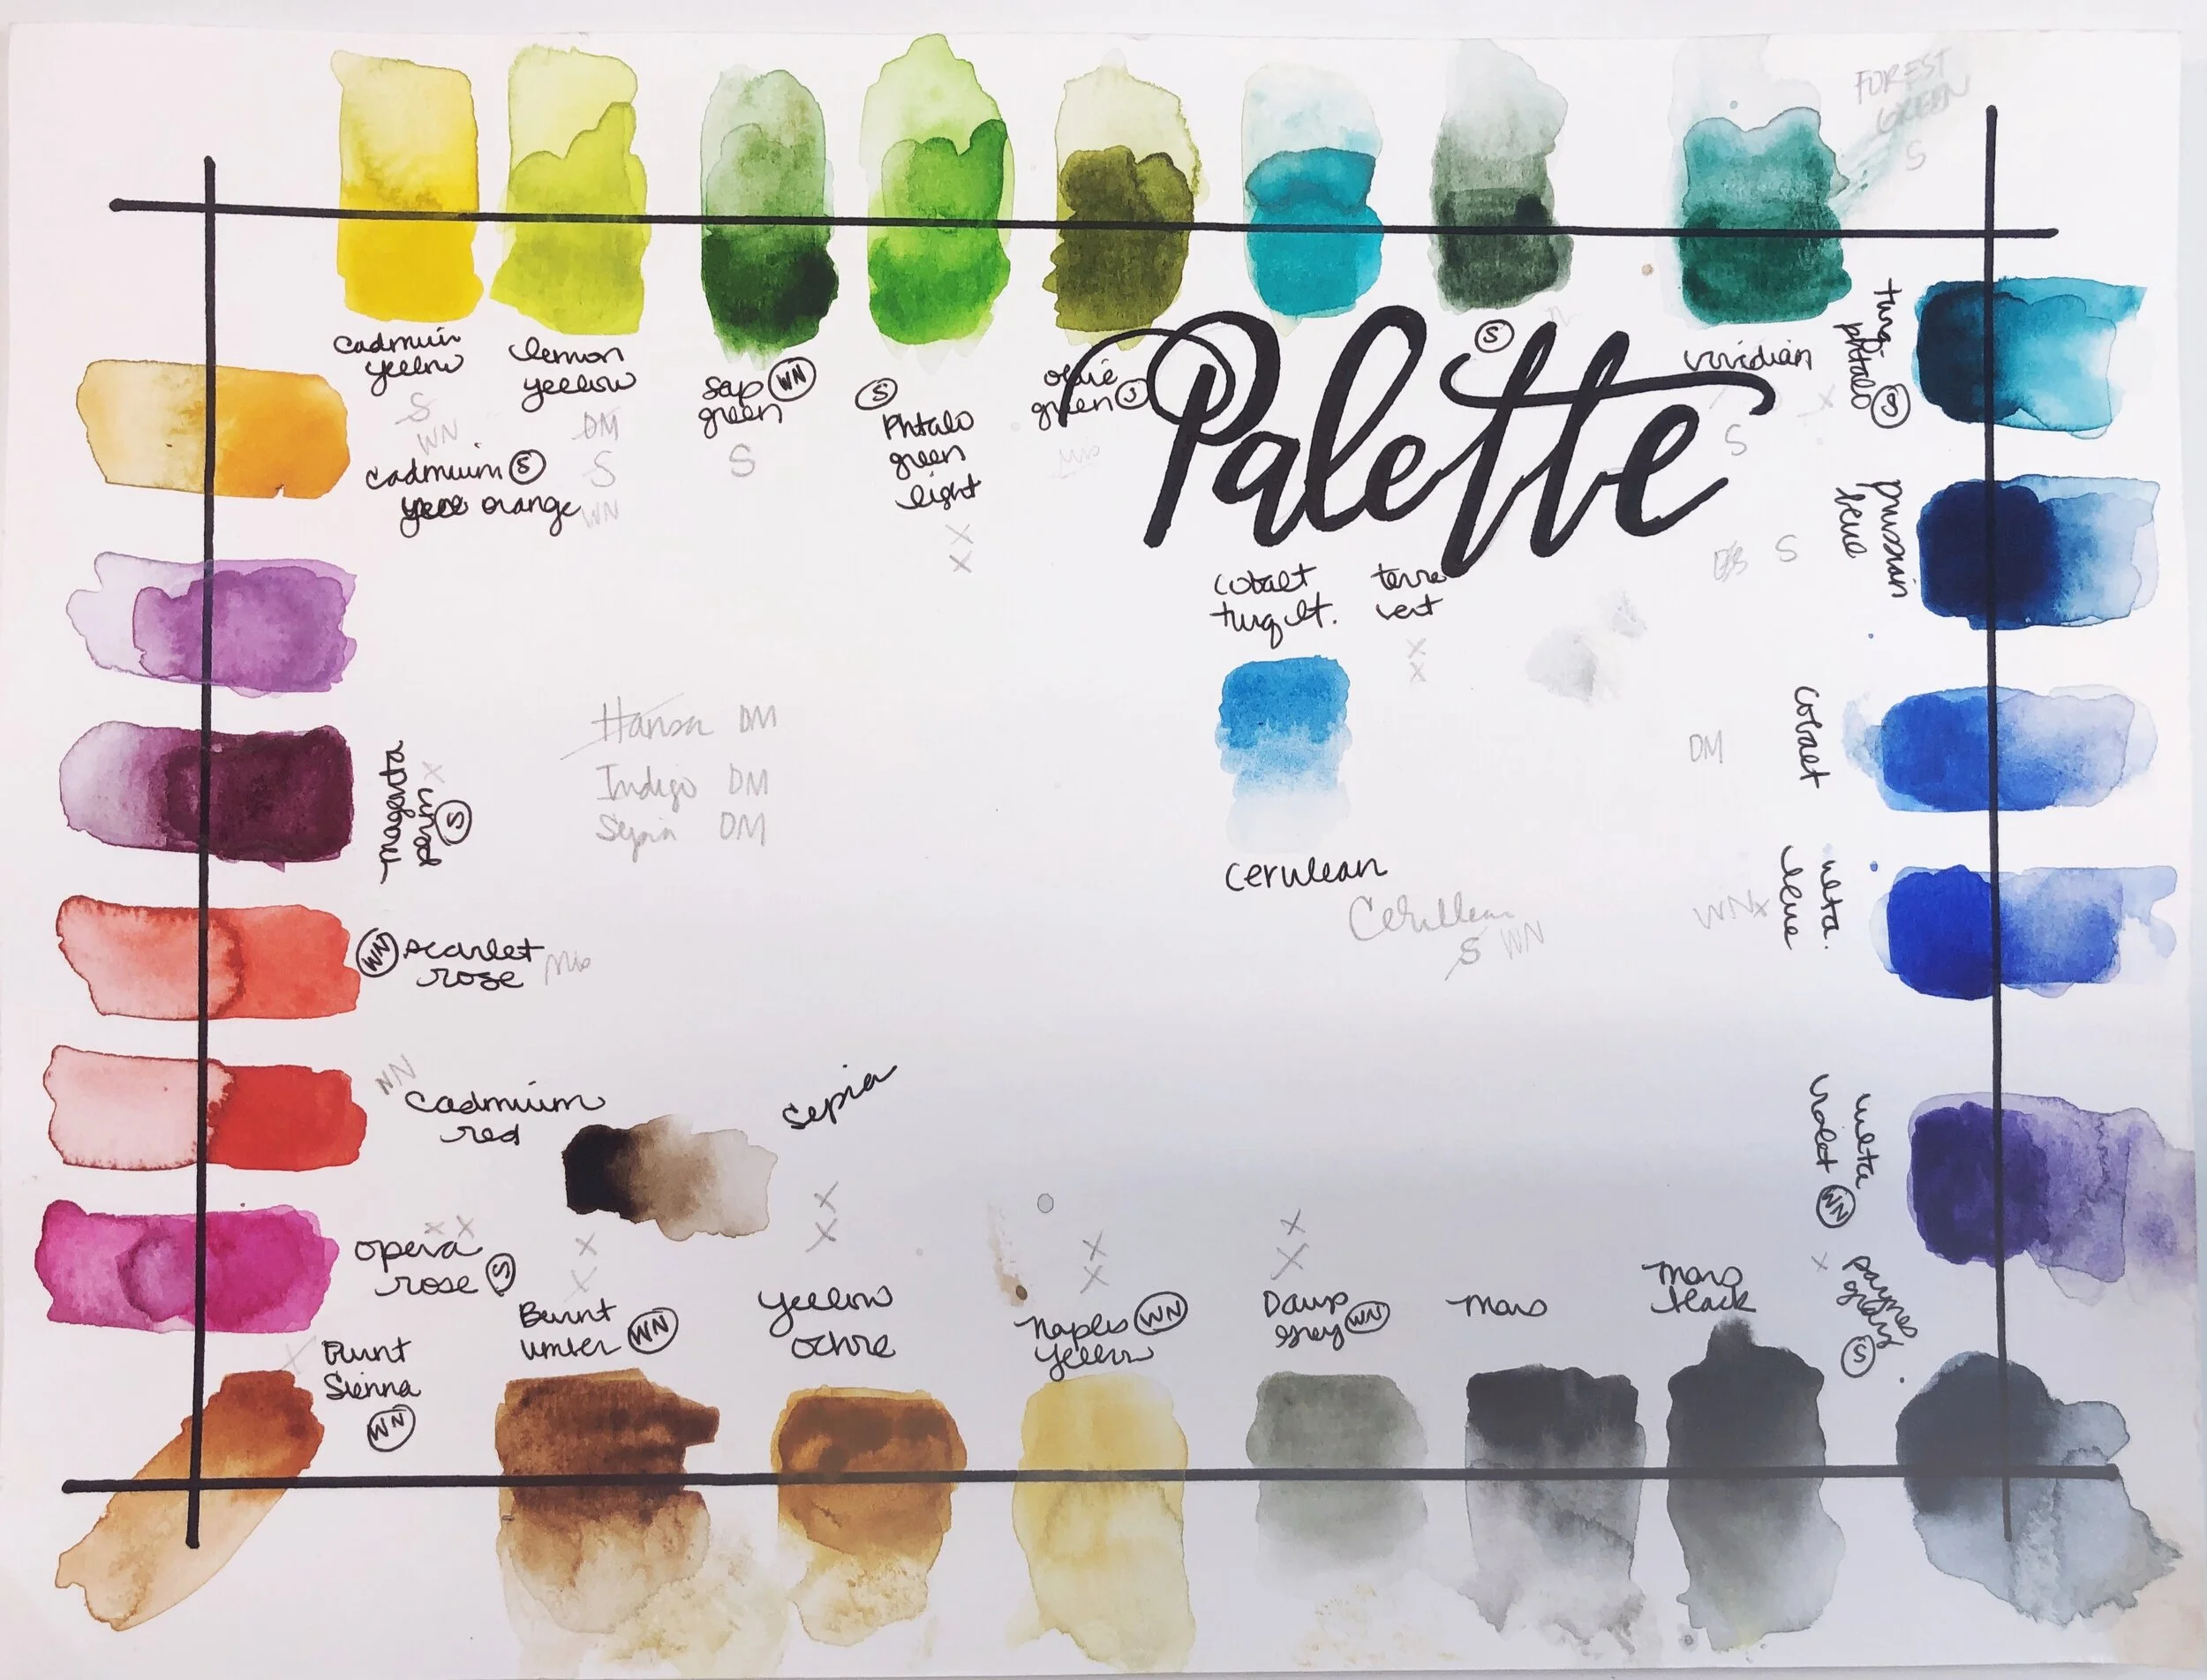
Creating a Color Chart:
PREP: I suggest using a 9x12” piece of loose watercolor paper to create your color chart grid. If you prefer you can also print one using this downloadable pattern. If you can print on watercolor paper, that’s great - otherwise print it on cardstock, it won’t give you tip top results, but it will due in a pinch. If you like to work small, you could also use your watercolor sketchbook, it would be a nice place of reference! View the the video below on the left to help you draw your Color Chart, and the one on the right for directions on how to go about painting it.
SUPPLIES: watercolor or printed cardstock, watercolor palette, watercolor brush. ruler or straight edge, permanent marker or pen, water cup, and paper towels.
Setting up your Studio:
Having a large and beautiful light filled space that’s always tidy - and filled with inspiration is wonderful … but rarely attainable. When I was growing up, I had a small T.V. tray in my bedroom that housed my art supplies, and now I paint in my basement. For years, I kept my precious paints stashed in an old bin that I pulled out to the dining room table for brief moments when my kids were napping. My point is, work with what you’ve got.
If you don’t have a spot in your home that you can leave your art supplies strewn about, I suggest grabbing a spare tote bag or sturdy box and organizing your supplies in there. That way, you’ll be able to whip them out at a creative moment’s notice. If you’re fortunate enough to have a designated space to paint grab your items together and proudly display them.
Set out your paints, palette, water cup and paper towel within arms reach. Grab that luscious watercolor sketchbook or paper and set your tape off to the side.
Watercolor Workout
BEFORE TODAY: Be ready with: Watercolor Workout pattern transferred to watercolor paper. The pattern should be transferred to loose watercolor paper before class starts. Print and use transfer paper or a light box to trace onto watercolor paper. Don’t have those? No problem, use the ol’ hold up to a window trick. Or, as always, feel free to draw your own version if you like. You should also have another sheet of blank watercolor paper or watercolor sketchbook ready to go with your role of tape. Set up your painting studio to your comfort. We will also go over a few techniques that use the following items that you may have on hand. Gather the items you have, don’t stress if you are missing something, just watch and make due. Table salt, Rubbing Alcohol, white crayon oil pastel or colored pencil or masking fluid, Kleenex.
REFERENCE:

Explore Further: Washes and Silhouettes
SUPPLIES: watercolor paper or sketchbook, tape, watercolors, brush, water cup, paper towels, and sumi ink or black paint and optional silhouette pattern.
VIDEO: Part II: Sketch out a silhouette on top of your dry watercolor washes. Choose and transfer from the silhouette pattern if you want to skip drawing. Paint with sumi ink or another flat black paint.
VIDEO: Part I : Tape off areas of watercolor paper in squares and rectangles. Do as many or few as you like. Fill areas with washes. Use and practice the techniques we learned in Lesson 1; flat wash, gradients, try using salt!
Creating Value
BEFORE YOU LOGIN TO LIVE LESSON: Be ready with: value scale pattern drawn or transferred to your watercolor sketchbook or loose watercolor paper, as well as a simple butterfly drawing or butterfly contour drawing pattern of your choice, transferred to your sketchbook or loose leaf watercolor paper before class starts. Print and use transfer paper or a light box to trace onto watercolor paper. Don’t have those? No problem, use the ol’ hold up to a window trick. Or, as always, feel free to draw your own version if you like.
Set up your painting studio to your comfort.
VIDEO:
Explore Further: Geometric Abstract Watercolor Pattern
SUPPLIES: Watercolor paper, watercolors, brush, water cup, paper towels, and Geometric Abstract Watercolor Pattern. Optional: metallic watercolor
REFERENCES:


VIDEO: Based on the modern watercolor artwork of Josie Lewis, trace the original geometric abstract pattern to a sheet of watercolor pattern. Use a ruler to trace if you like extremely straight lines, or just go slow. Using a variety of values, paint in each shape, leaving a small area of white paper between shapes if you so desire.
Explore Even Further: Gem Stone Painting
SUPPLIES: Watercolor paper, watercolors, brush, water cup, paper towels, and gemstone watercolor value pattern and gemstone reference. Optional: masking fluid.
REFERENCES:
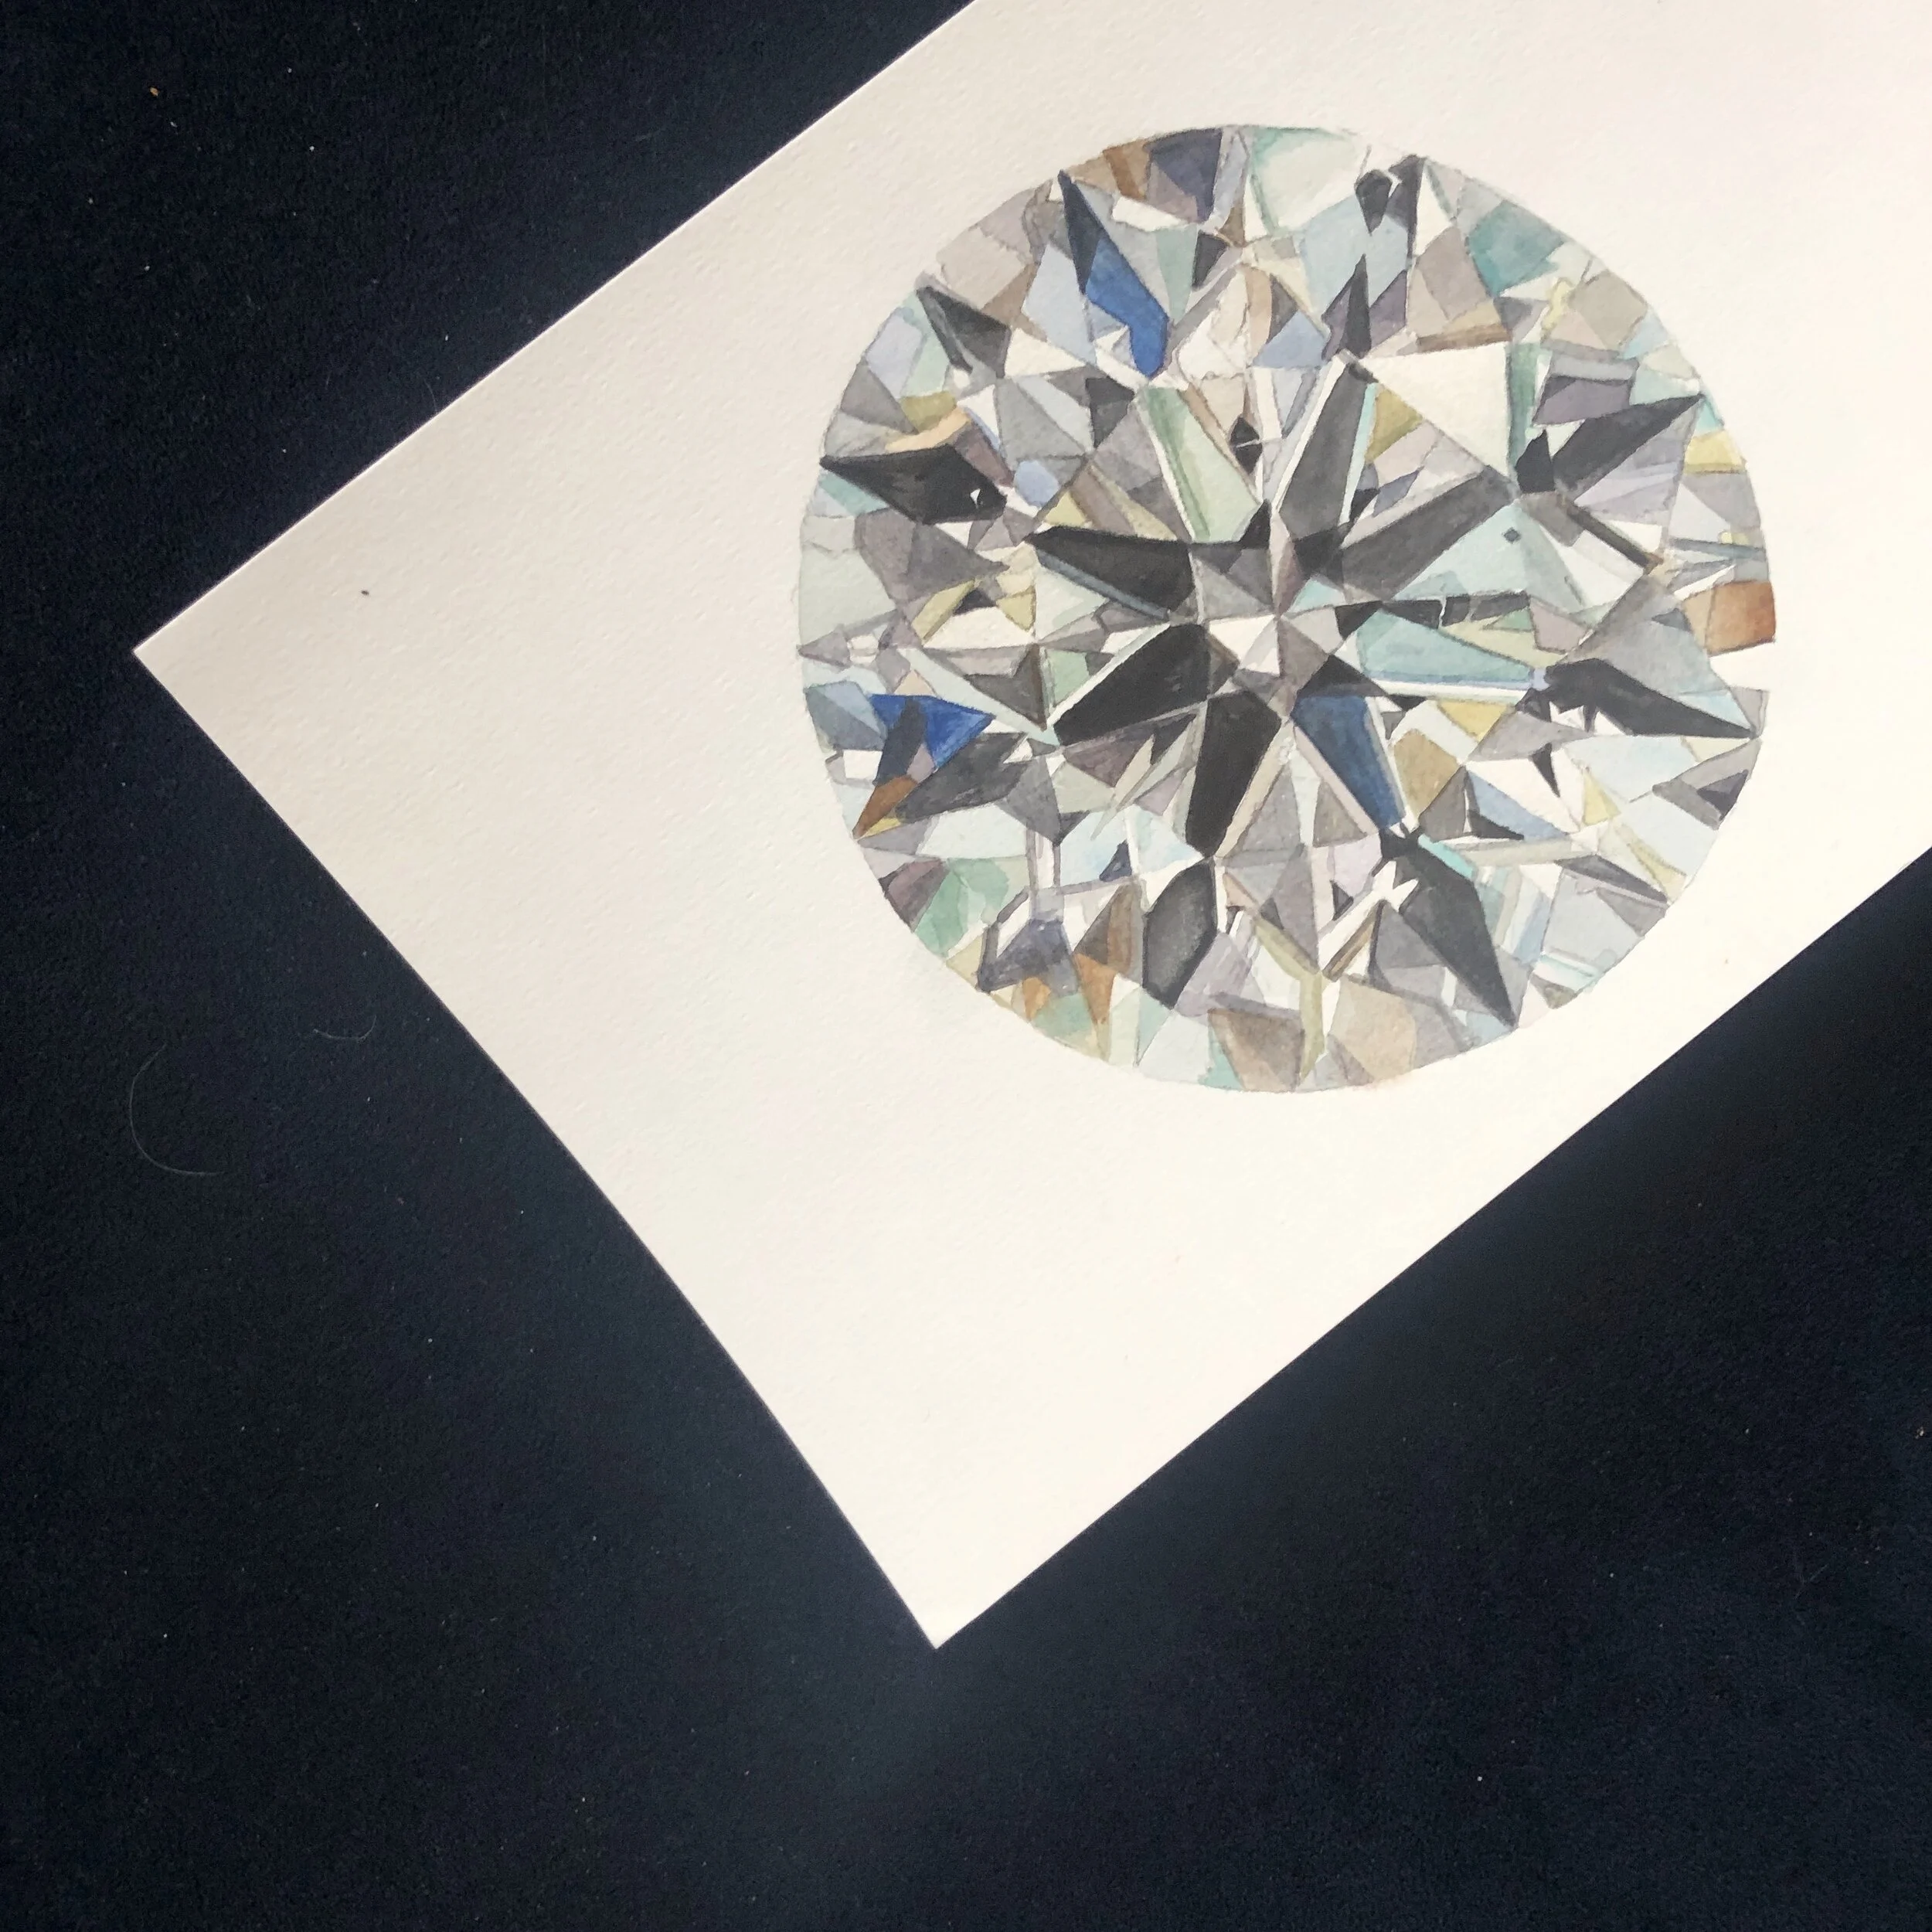
VIDEO: This is a challenging exercise, grant yourself some grace and go into this project knowing that it might take a few hours to complete. That being said, this is a great project to work on and off on. And when you complete it, it looks spectacular. I encourage you to give it a go! I can’t wait to see the results.
LIVE lesson Feb. 16th: Smoky Mountain Landscape
BEFORE YOU LOGIN TO LIVE LESSON: Be ready with: a half sheet of 9x12” watercolor paper taped down to a surface. Ready your watercolor sketchbook or other scrap sheets of paper to use throughout lesson. Set up your painting studio to your comfort.
There is no pattern to transfer for this live lesson. We will be drawing with our brush.
VIDEO: Use different values to create the illusion of space while we paint a scene from the Smoky Mountains.
REFERENCES:


on your own: Using your Brush
Common Brushstrokes:
SUPPLIES: Watercolor paper or sketchbook, watercolors, brush, water cup, paper towels
REFERENCES:

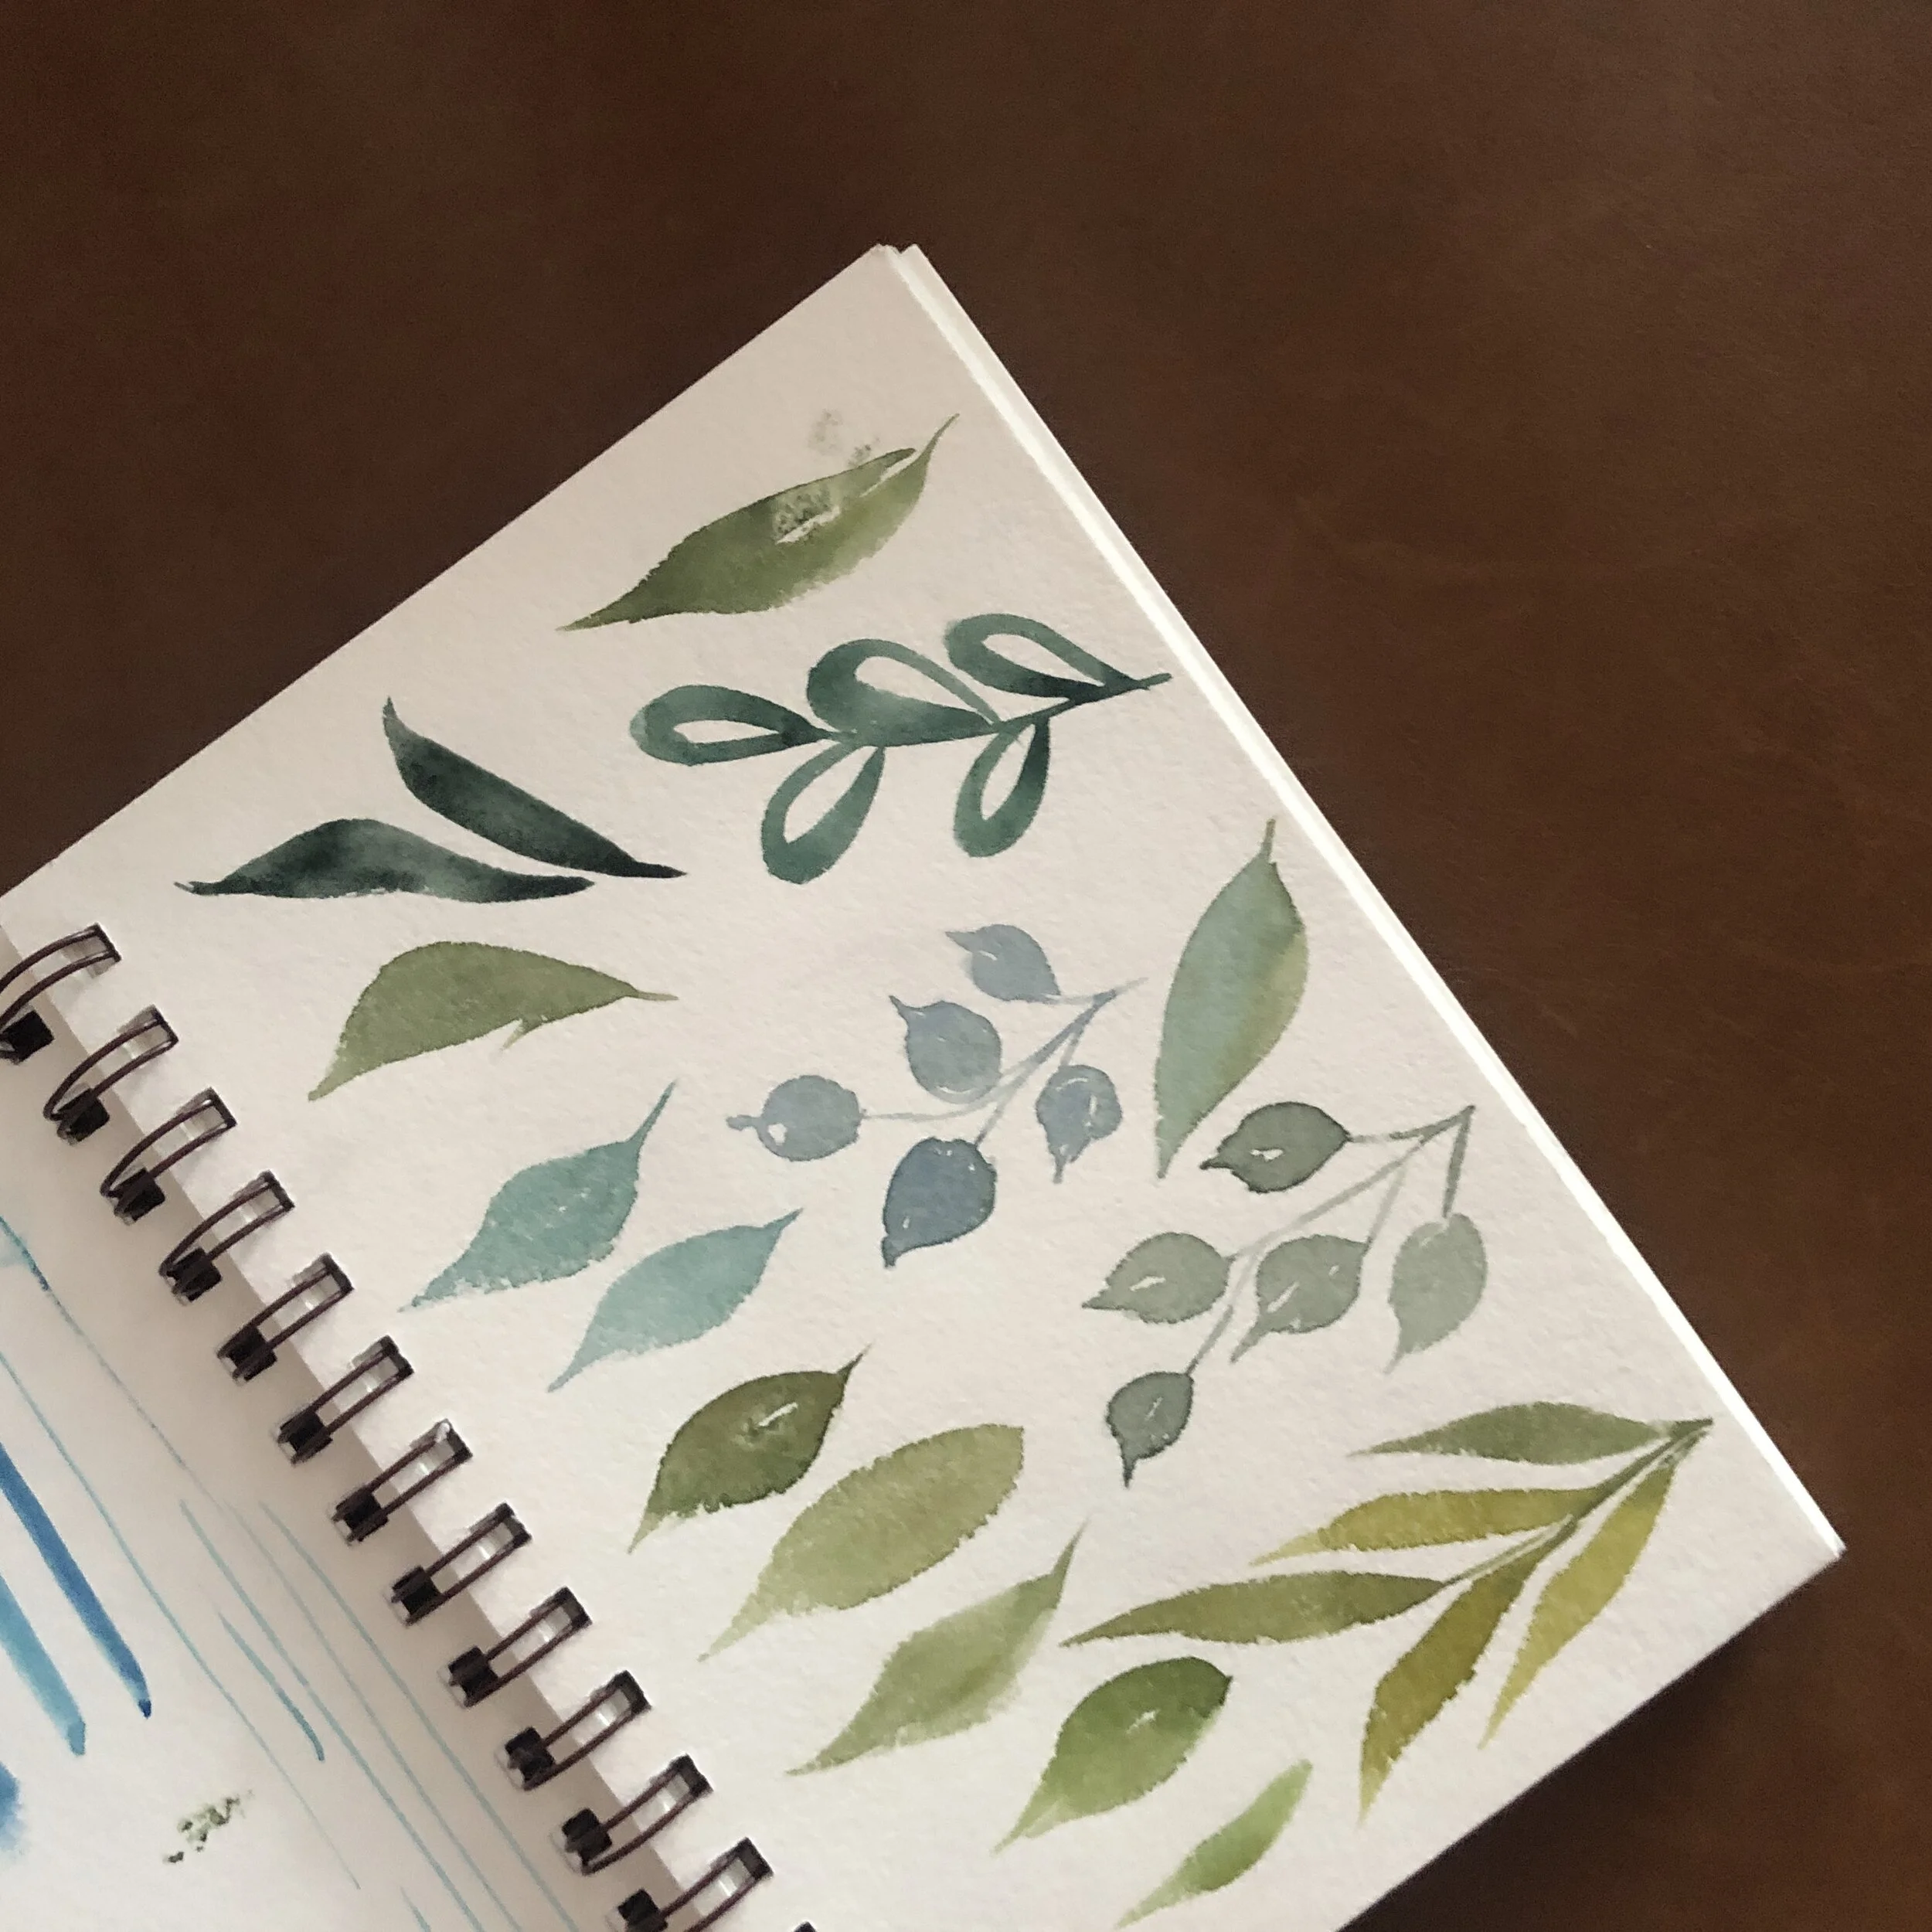
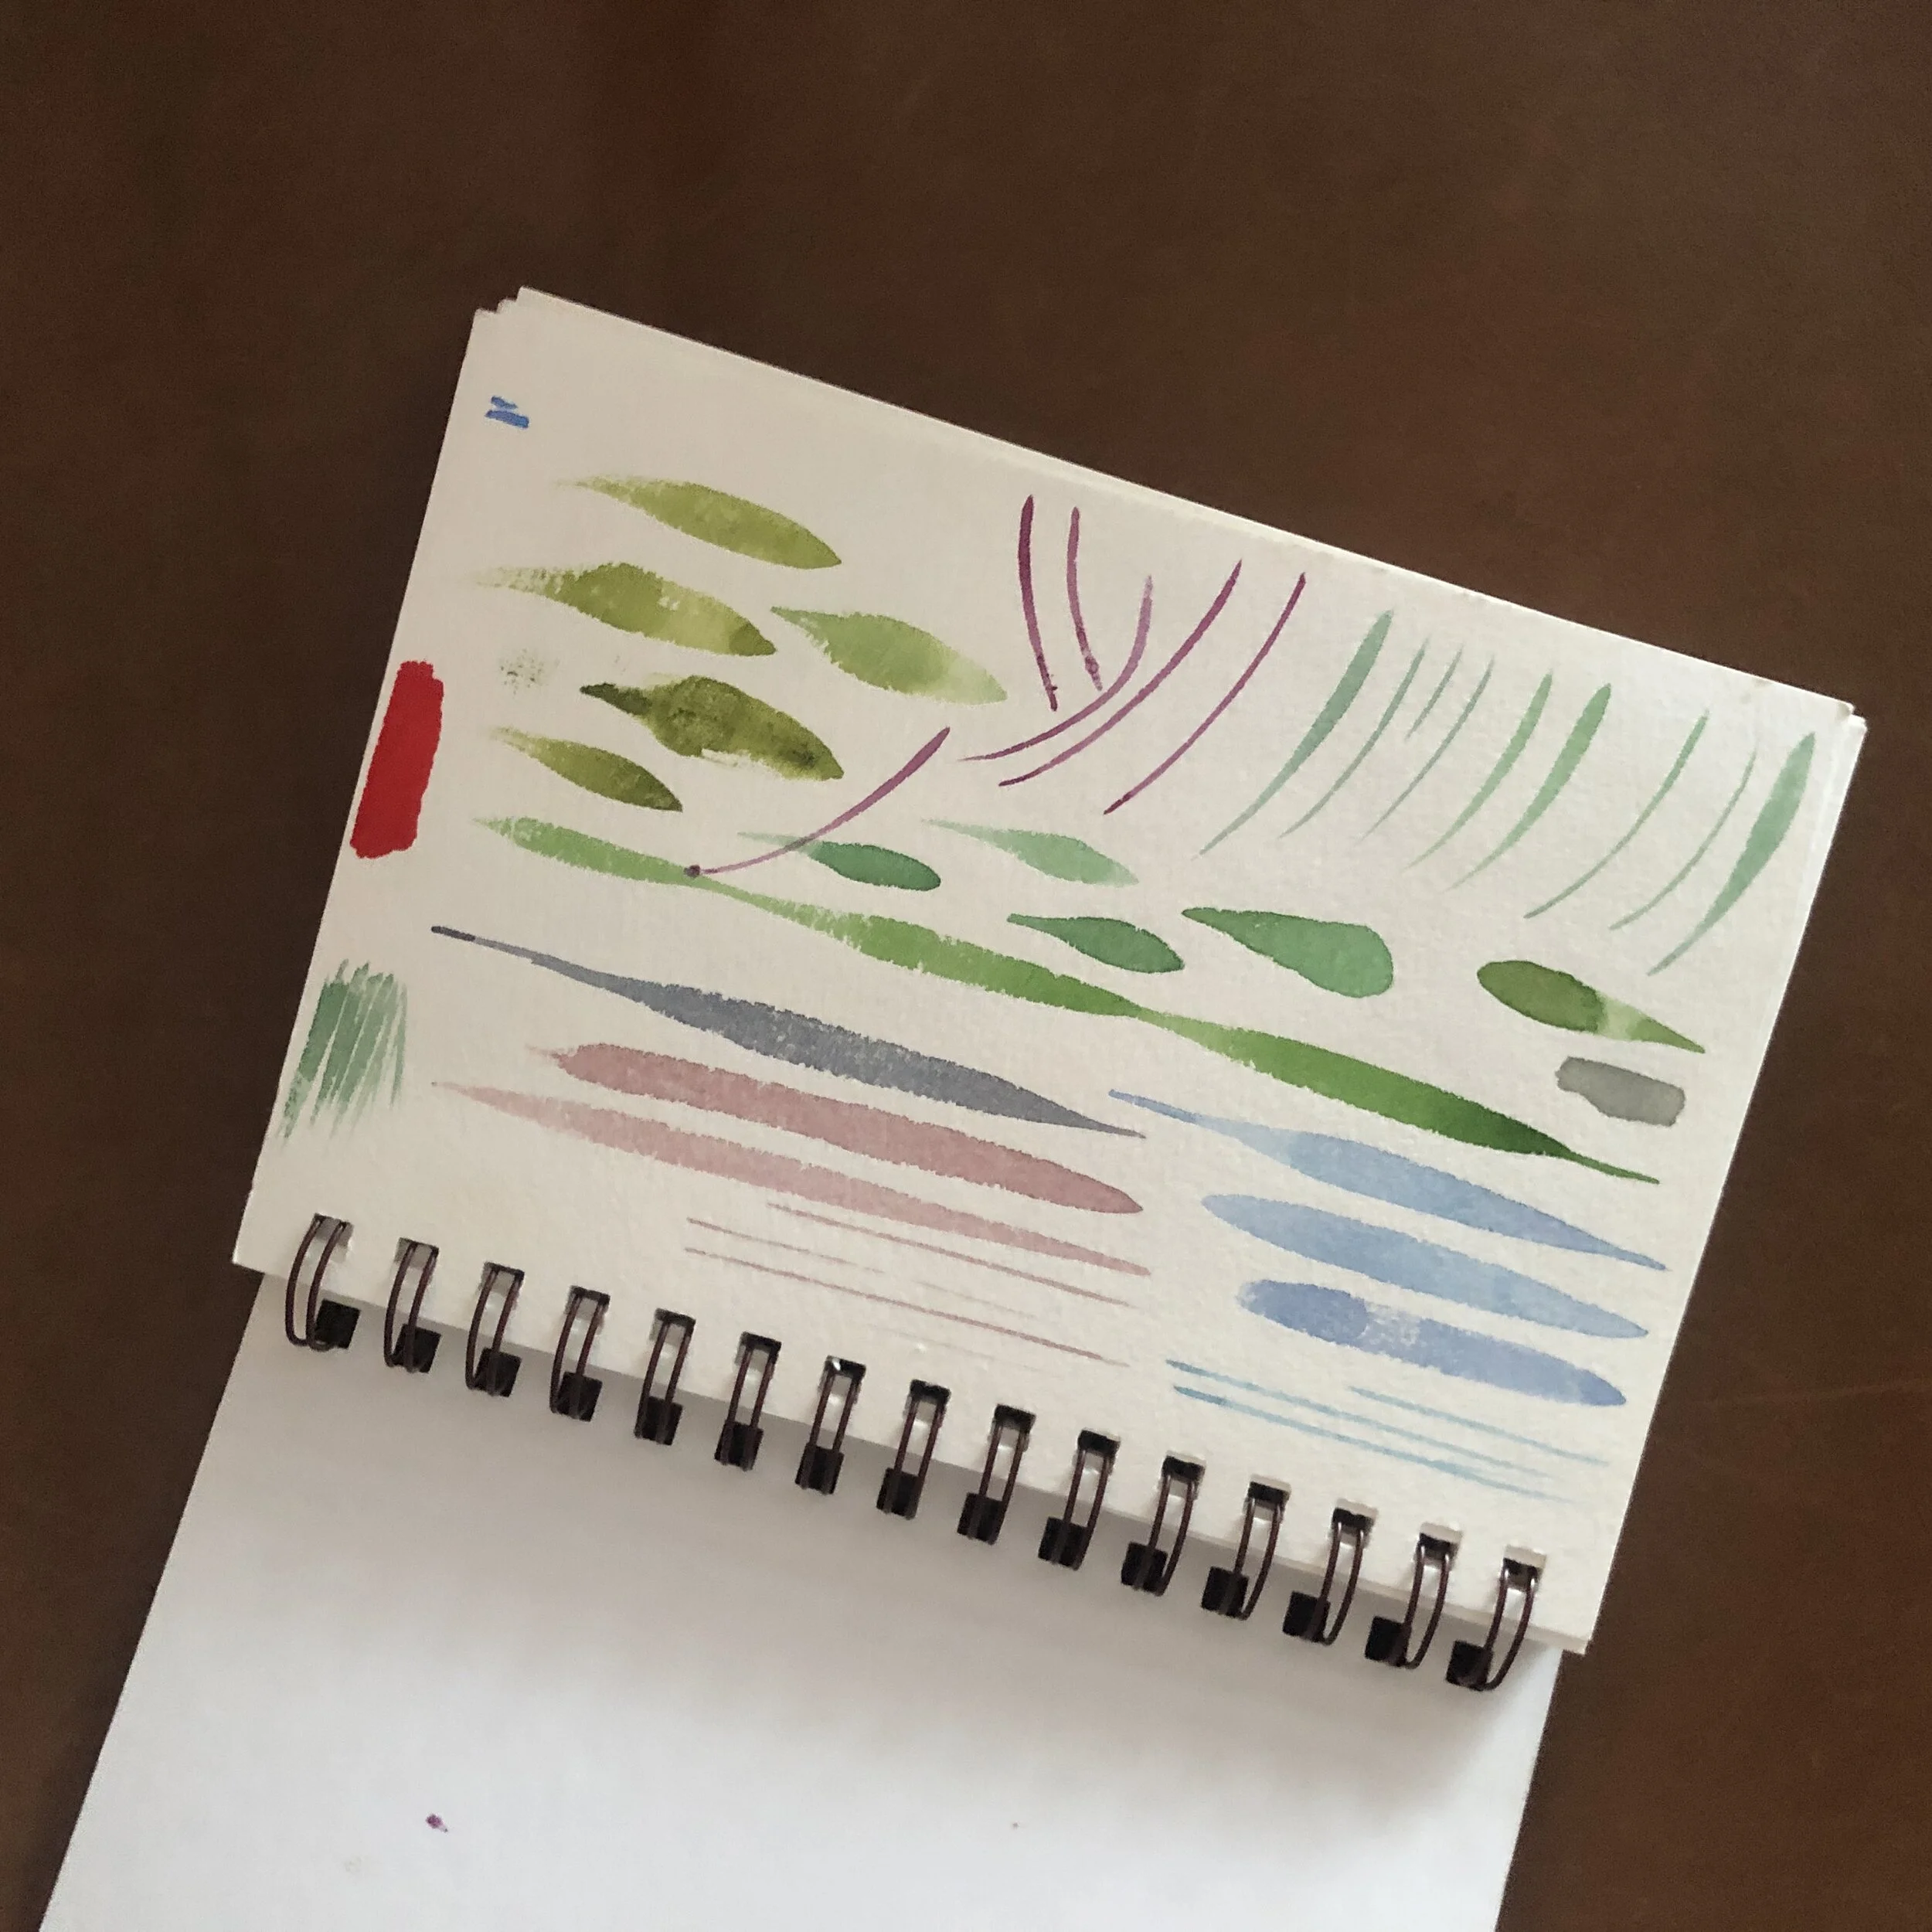

VIDEOS: Relax with your watercolor sketchbook and fill your pages with practical brushstrokes that will be used in almost every painting you make.
Explore Further: Create a Set of Abstract Notecards:
SUPPLIES: Watercolor paper, watercolors, brush, water cup, paper towels and scissors or ruler
REFERENCES:
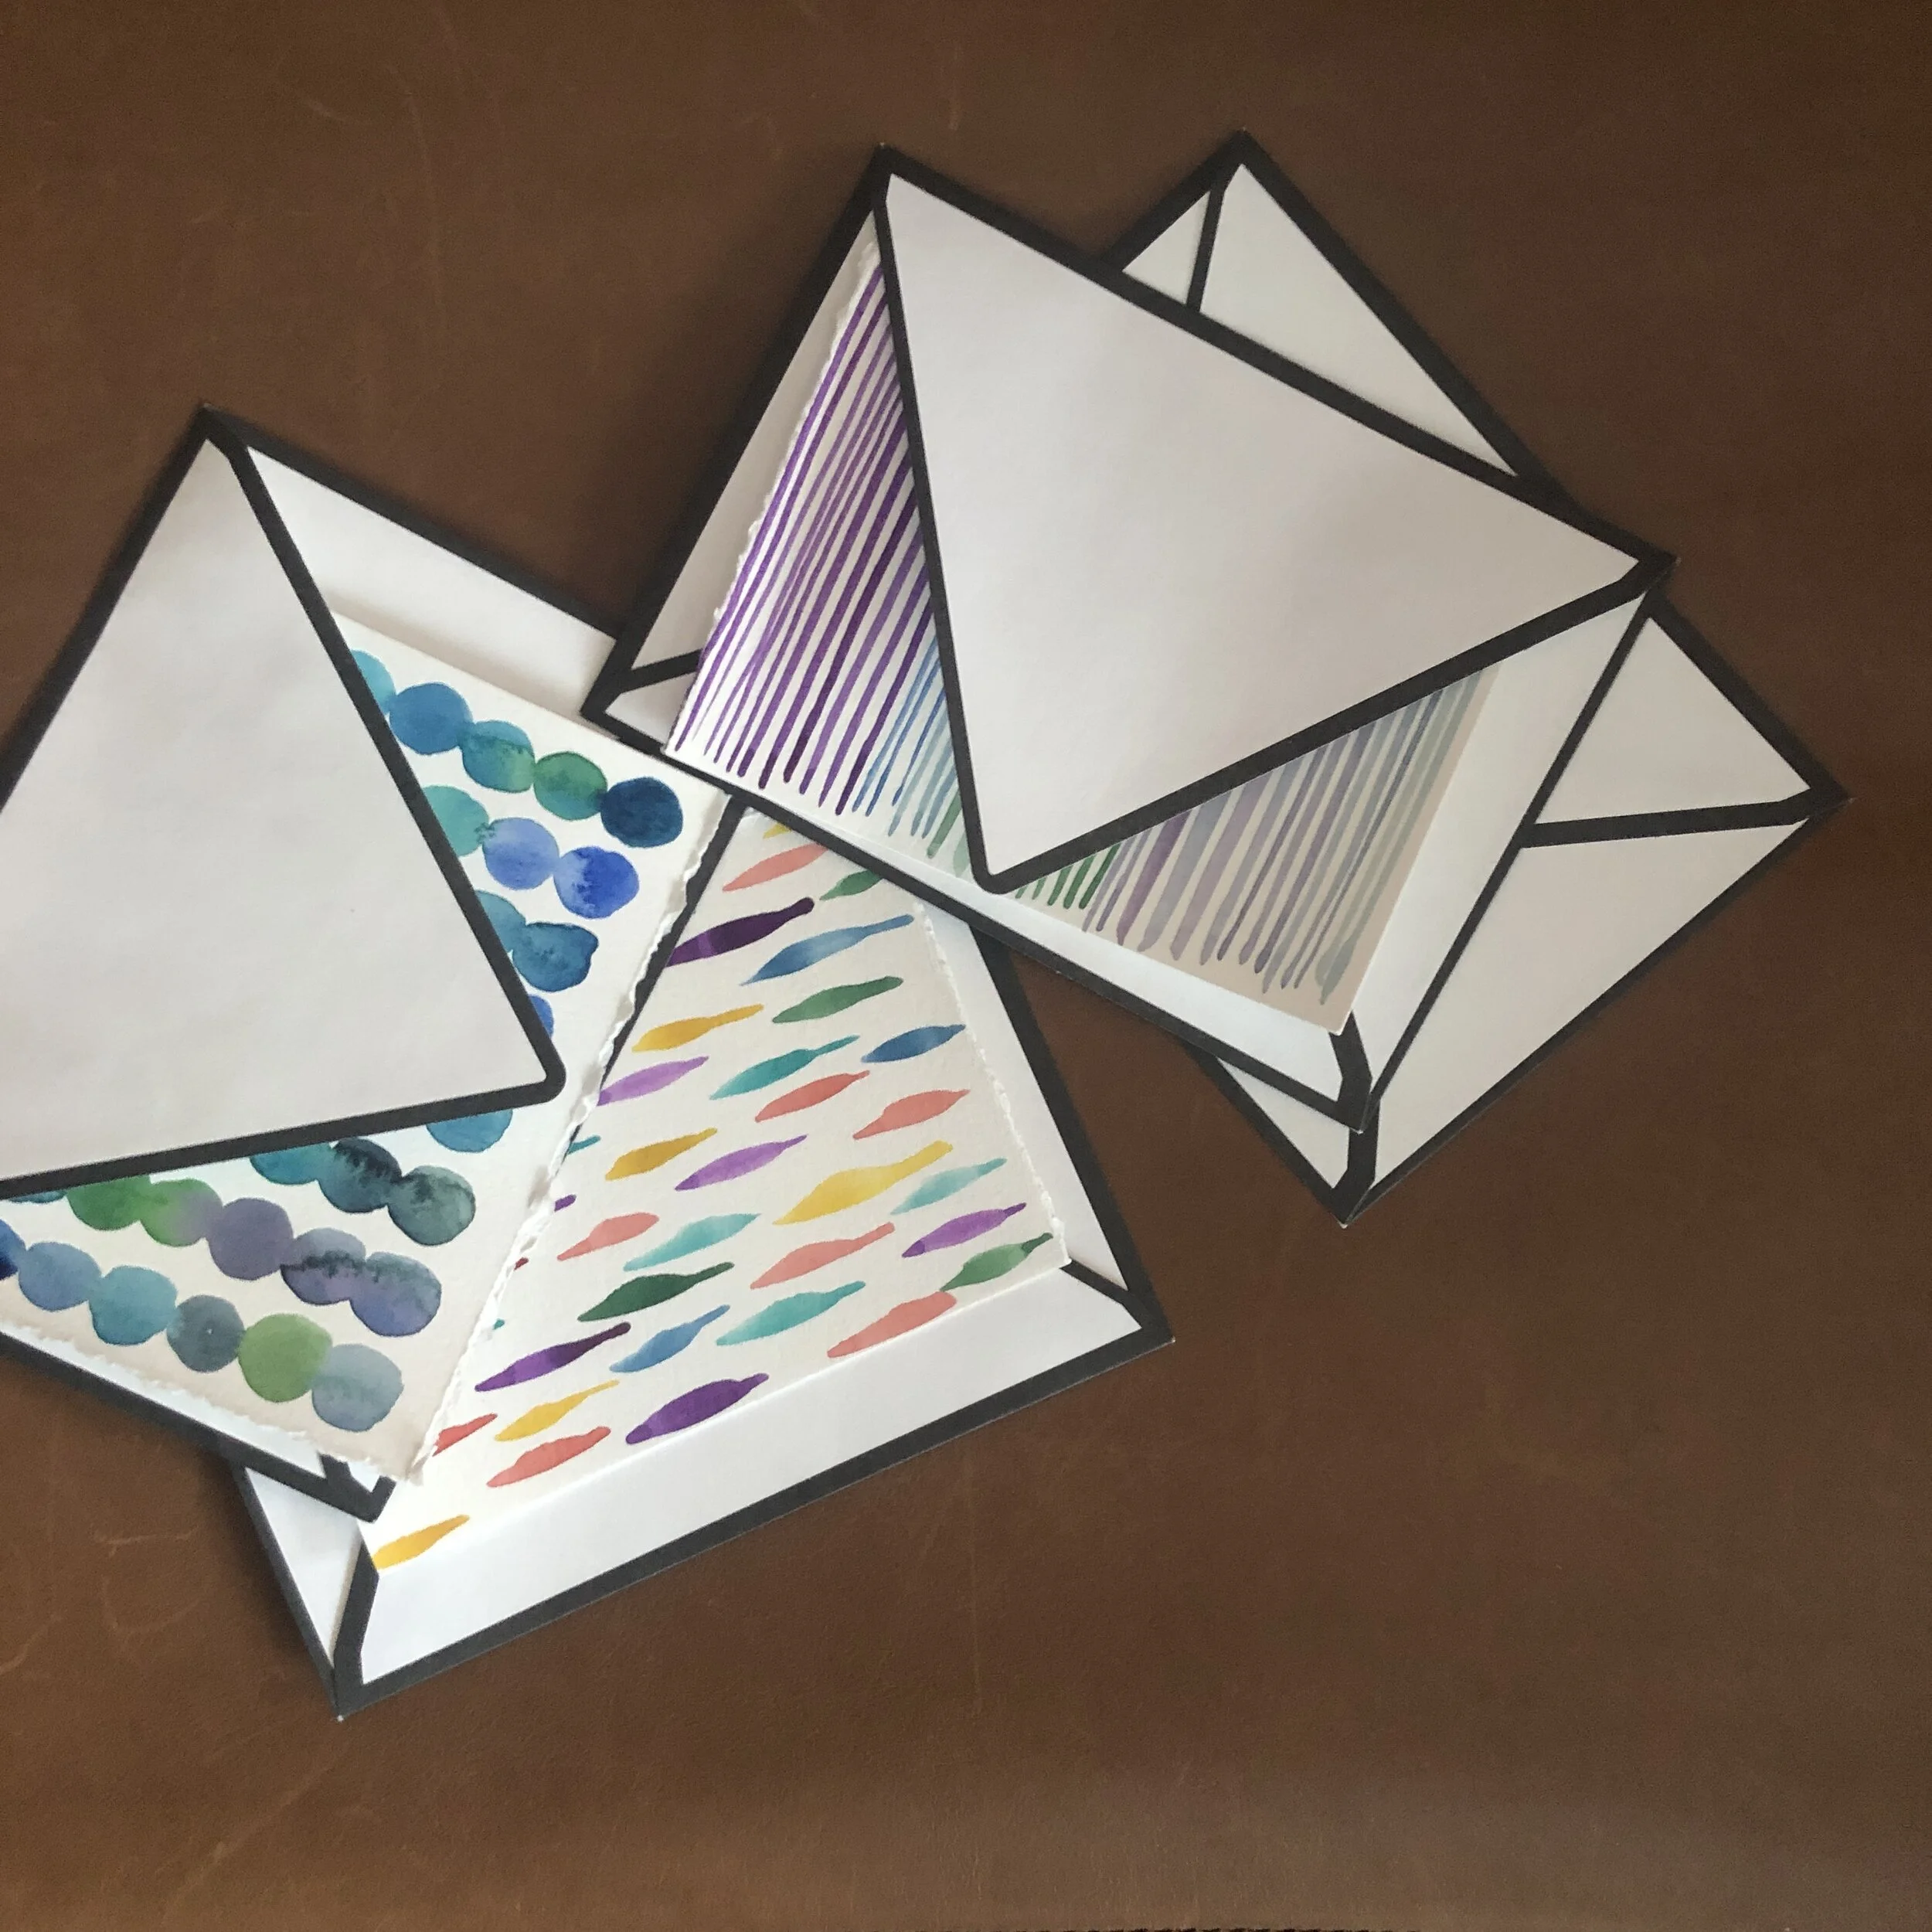
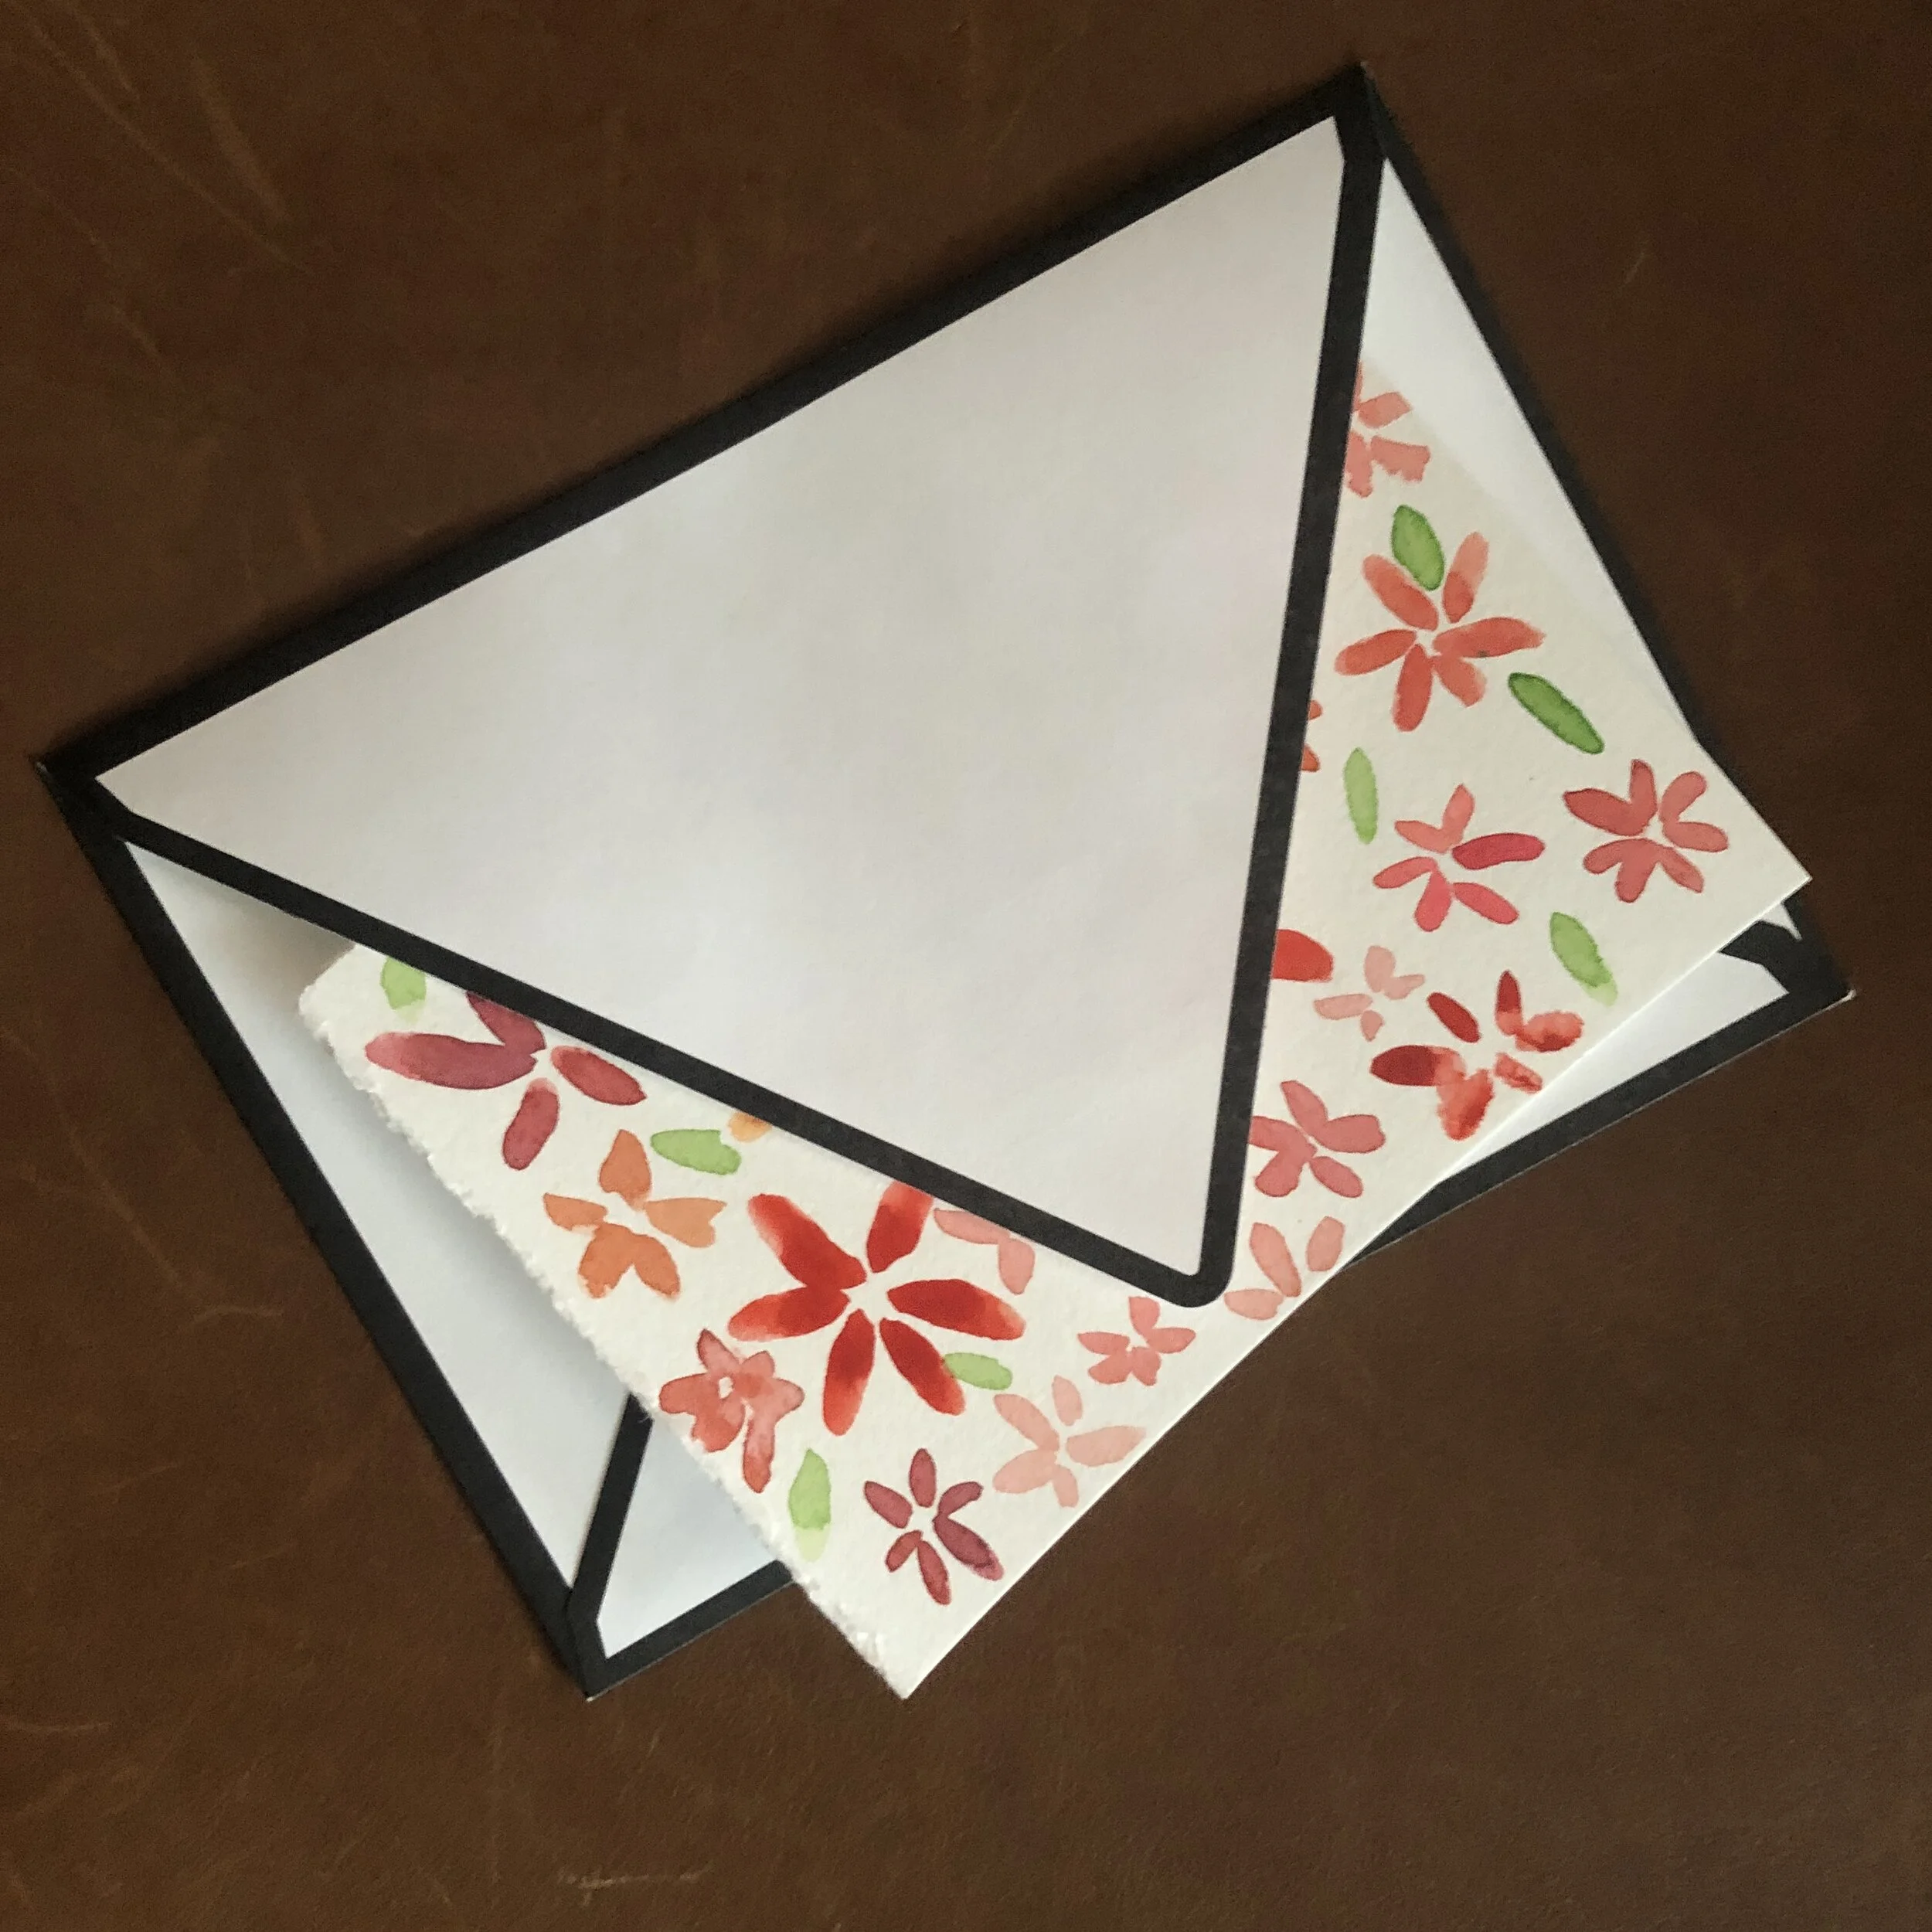
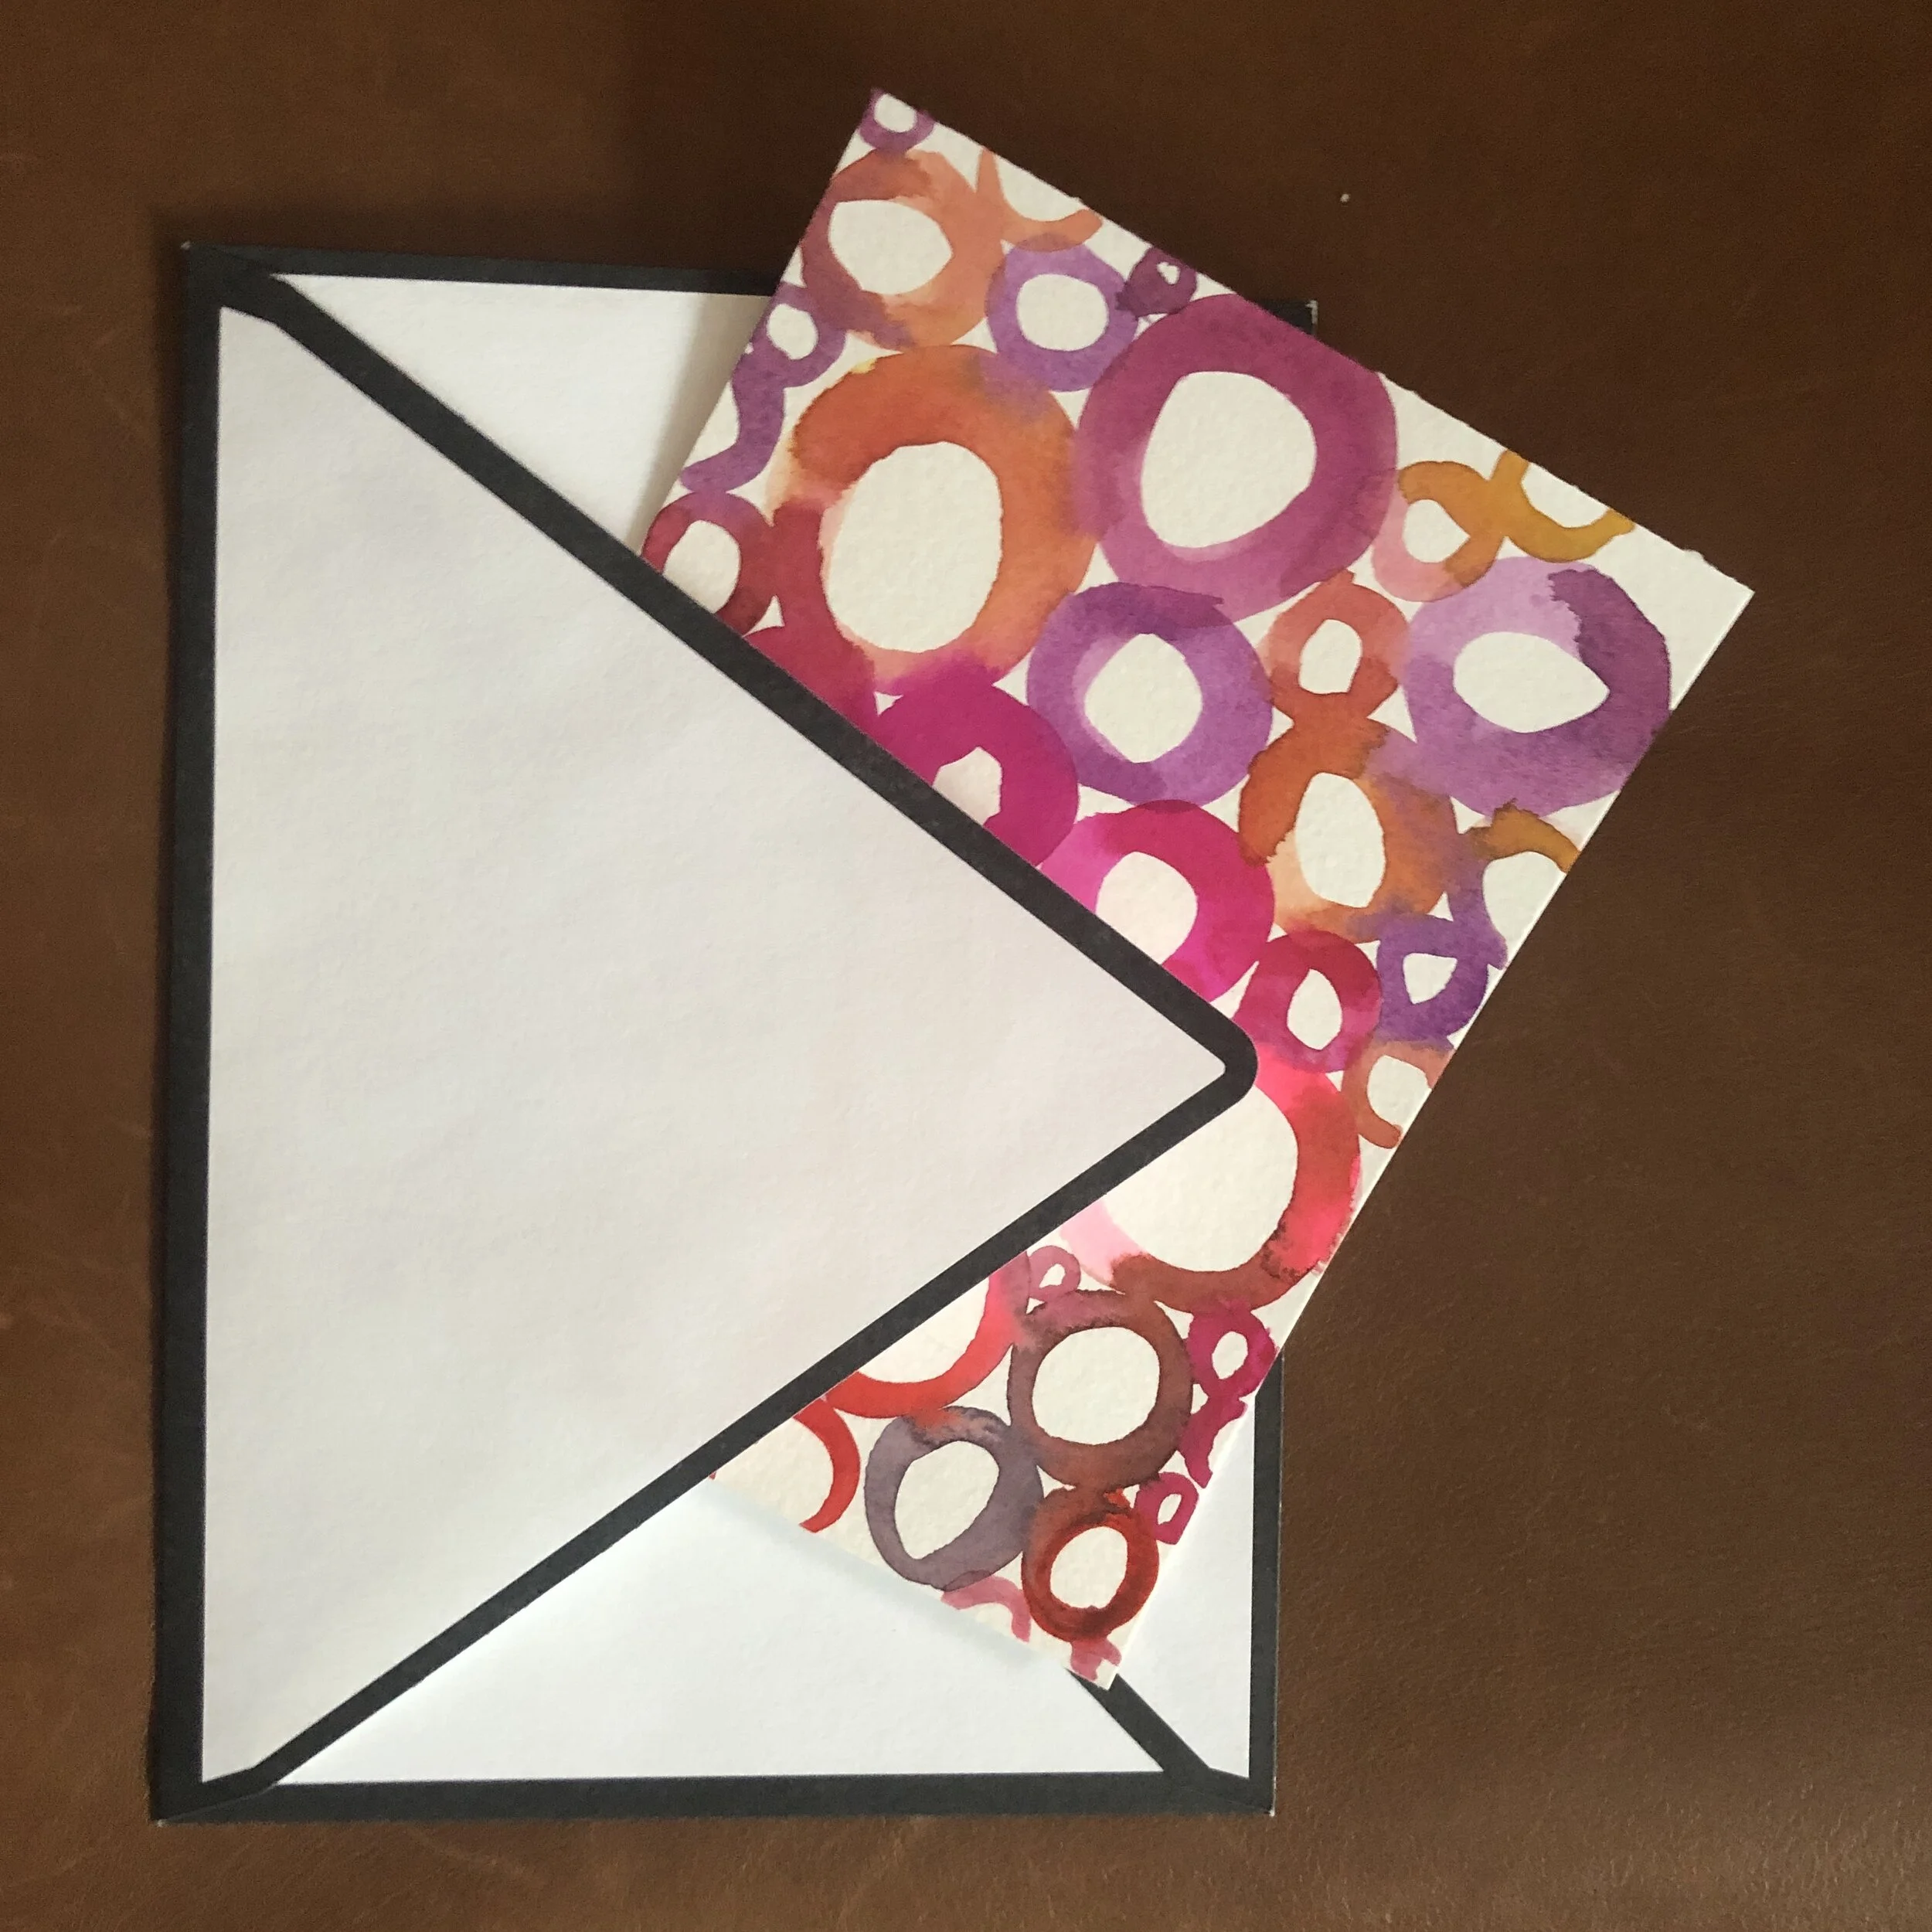
VIDEO: Grab a 9x12'“ watercolor paper and tear it into fourths. We will use each individual smaller sheet to create an abstract notecard, filled withe basic brushstrokes that we previously practiced. Repetition makes an easy and powerful creative statement.
Explore Even Further: Modern Landscape
SUPPLIES: Watercolor paper, watercolors, brush, water cup, paper towels, and Modern Landscape Watercolor Pattern.
VIDEO: Try your hand at a modern take of a landscape. In this simple composition, we take a stylistic approach and use a circular frame to set off our painting. Use the brushstroke previously practiced to create leaves on the outer edge. This is an older video tutorial, but I wanted to include it for anyone that wanted to try hteir hand at a new take on a similar landscape.
Just a friendly reminder that today is our last LIVE lesson.
Access to this website will remain for the following two months, giving you lots of time to complete or repeat lessons. If you’re interested in continuing to paint in watercolor with me and like this format - check out Watercolor in the Afternoon for kids and teens and Watercolor in the Evening for Adults and mature teens.
LIVE lesson Feb. 23rd: Leafy Monogram
BEFORE YOU LOGIN TO LIVE LESSON: Be ready with a 9x12” piece of paper taped down with the leafy monogram pattern of your choice (choose a letter that’s special to you from the assortment here) or trace the greenery pattern on page one from the pattern and erase a bubble letter from the center. Optional: Use masking fluid or tape to block off your letter. Alternatively leave your paper just as it is after you trace and we will just paint around it during class.
Print and use transfer paper or a light box to trace onto watercolor paper. Don’t have those? No problem, use the ol’ hold up to a window trick. Or, as always, feel free to draw your own version if you like.
Set up your painting studio to your comfort.
REFERENCES:
Explore Further: Terrarium Painting
SUPPLIES: Watercolor paper, watercolors, brush, water cup, paper towels, and Geometric Abstract Watercolor Pattern
VIDEO: Practice your brush strokes by making repetitive, overlapping marks that fill a bottle.
Explore Further: Lemon Painting
SUPPLIES:
VIDEO:
This email contains affiliate links. Active links that may lead you to a trusted recommended product that I may make a small commission on, at no cost to you.